Thu Jan 07 2021
How to easily deploy your React app
Deploying a React app isn't hard. In this post I show you how to do it in under 2 minutes with the free to use Netlify platform.
Deploying a React app (and even apps built on it) should not be a drag. I use the word drag here because I first attempted to deploy my react apps to GitHub pages to showcase them on my portfolio and it was very very tiring due to the many steps I had to go through. The good news is that you do not have to do that. There is a far easier way to do this and I am here to show you how.
In order to deploy your React app online, all you need is 2 different things.
The React app you intend to deploy
Getting the React app ready to deploy
Considering that you are on this blog post looking to learn about deploying it, I assume that you already have your React app ready and open on your IDE (I use Visual Studio Code). If you haven’t, open it, stop the server and type in your the React Build command
1npm run build
PS- remember that the build command for frameworks such as Gatsby might differ, so make sure you type in the build command to match your framework.
Once you have run the build command, React will start doing its magic and start bundling all the files together, minifying them and just everything it needs to make sure your app is now production-ready. After the building is done, you will see that your project folder has a new folder with the name Build. This is where all your build data lies and is the only important folder for us at the moment.
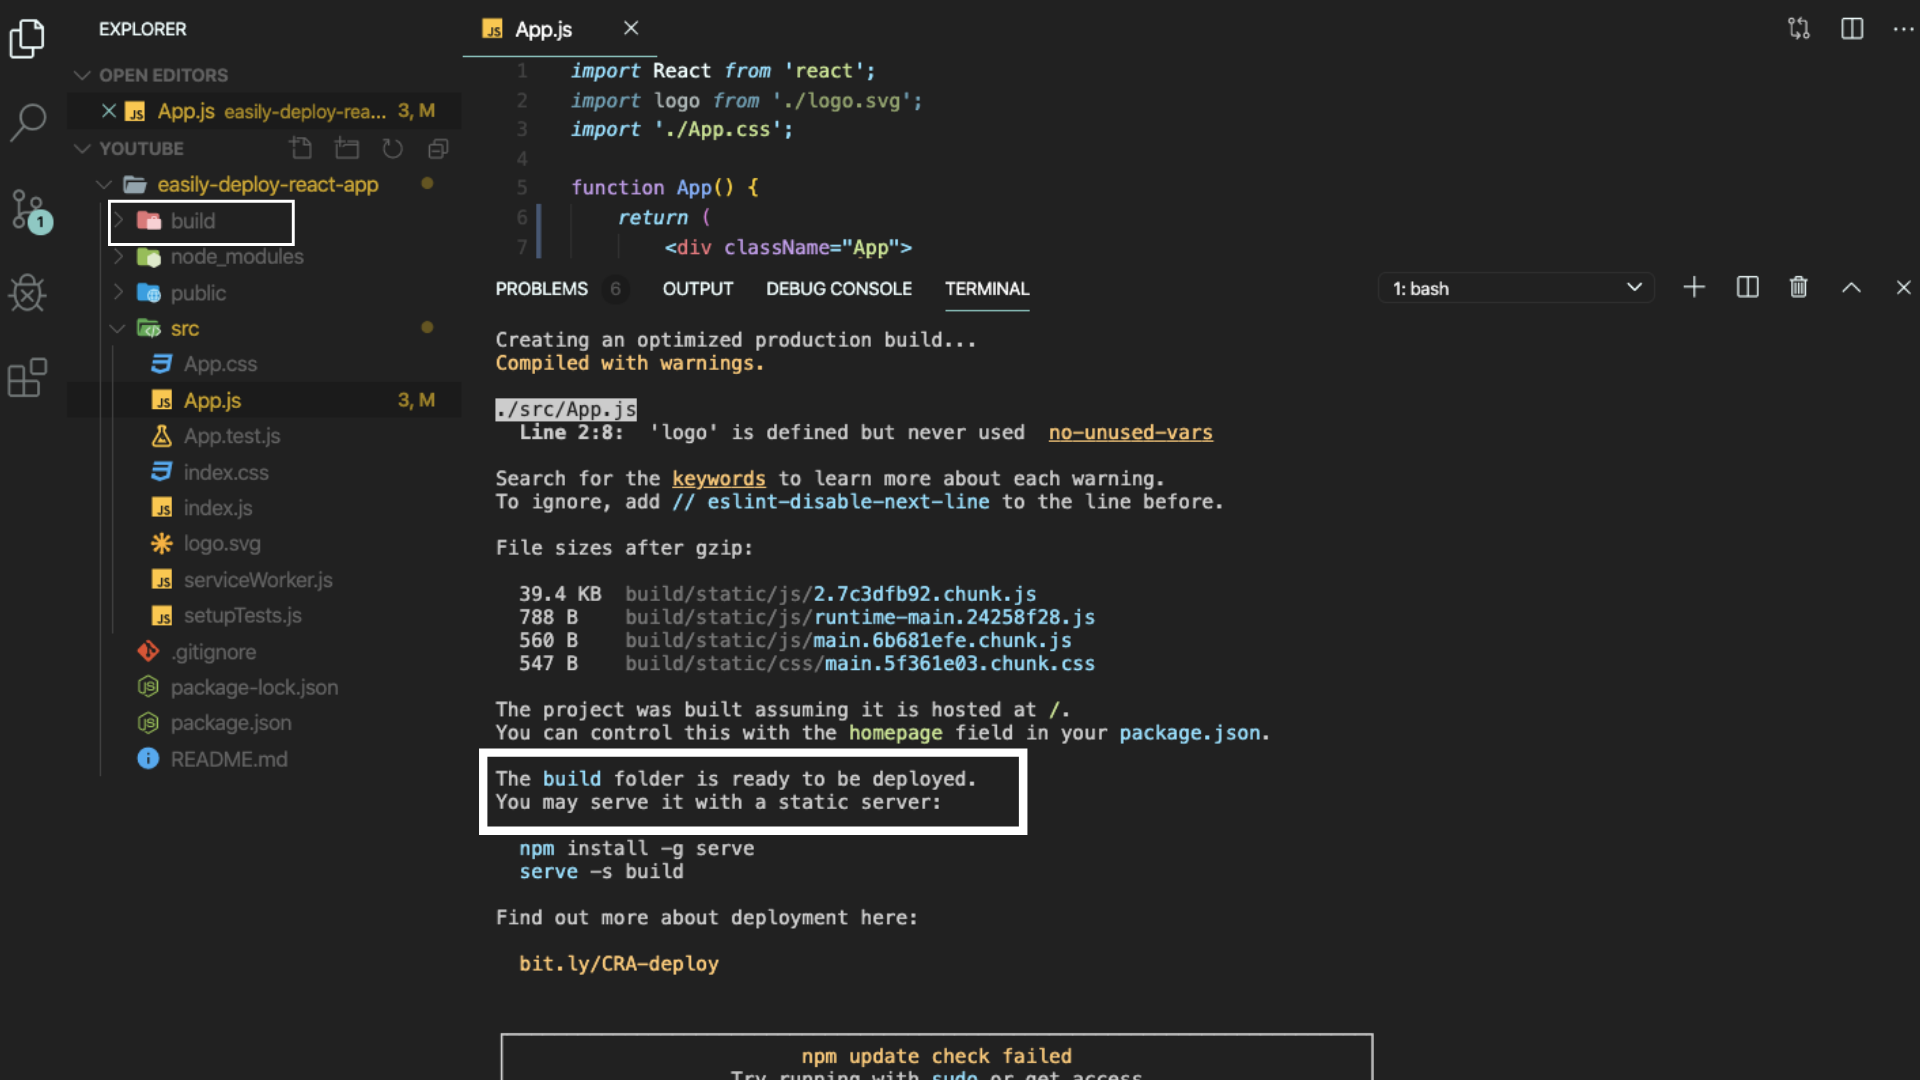
If you have the build folder ready, congratulation! You have now completed step 1 and is now ready to move onto step 2 with Netlify.
Deploying the React app to Netlify
Before I jump into deployment, I wanna talk about what Netlify is. The folks at Netlify like to identify themselves as
'An all-in-one platform for automating modern web projects. Replace your hosting infrastructure, continuous integration, and deployment pipeline with a single workflow’
And to be honest, that is exactly what they are. They are (in plain English) the providers of a platform that lets us host our web development projects for free (they really have a great free tier).
To get started with Netlify all you have to is go and create an account here. When you do, you will be asked to confirm your email address as usual. Once that is done, you will be taken to a page which looks the one below
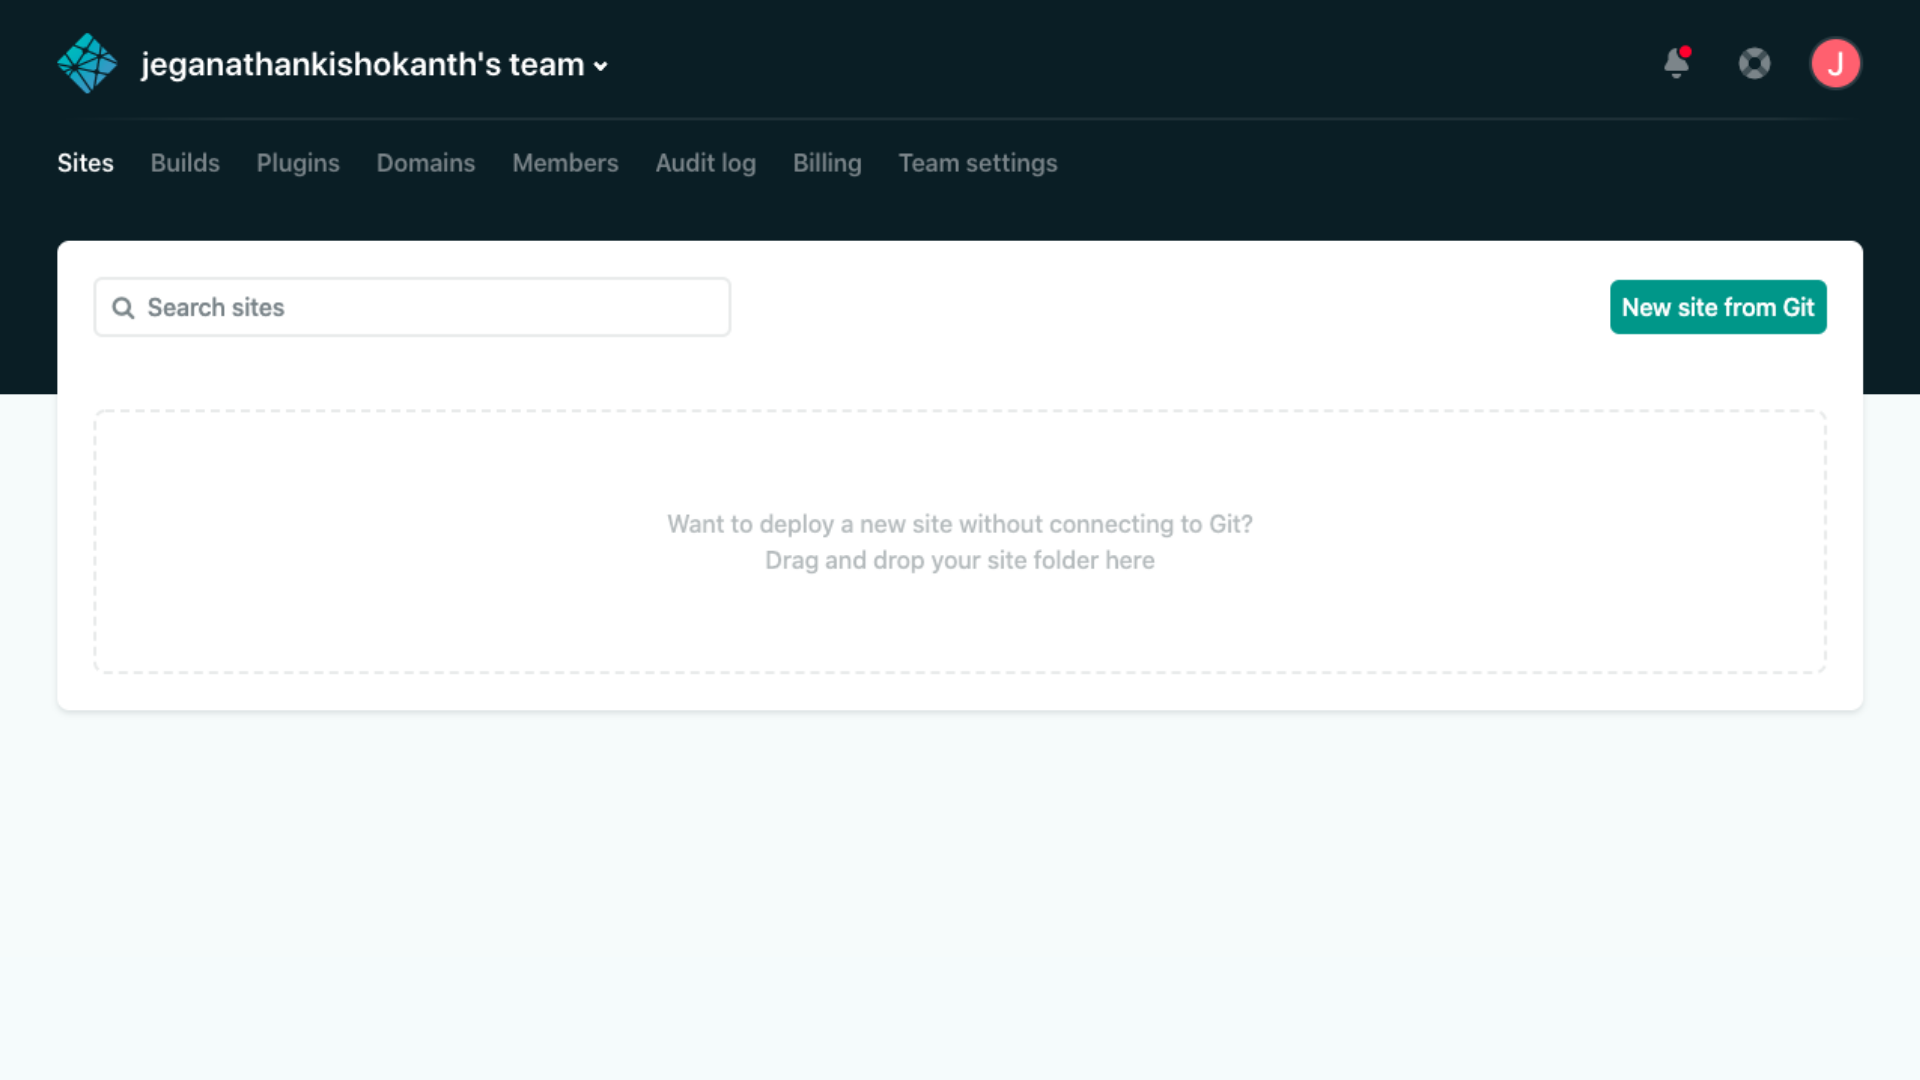
Great! So the only thing that is left for us to do is to drag our React build folder from step 1 onto this empty space in Netlify. Once you Netlify will take some time process the files you just gave it and after a bit of time (depending on how large your app is), it will deploy your React app with a funny name like the one I have here. To see your deployed React app that was just deployed, all you have to do is click that link with the funny name.
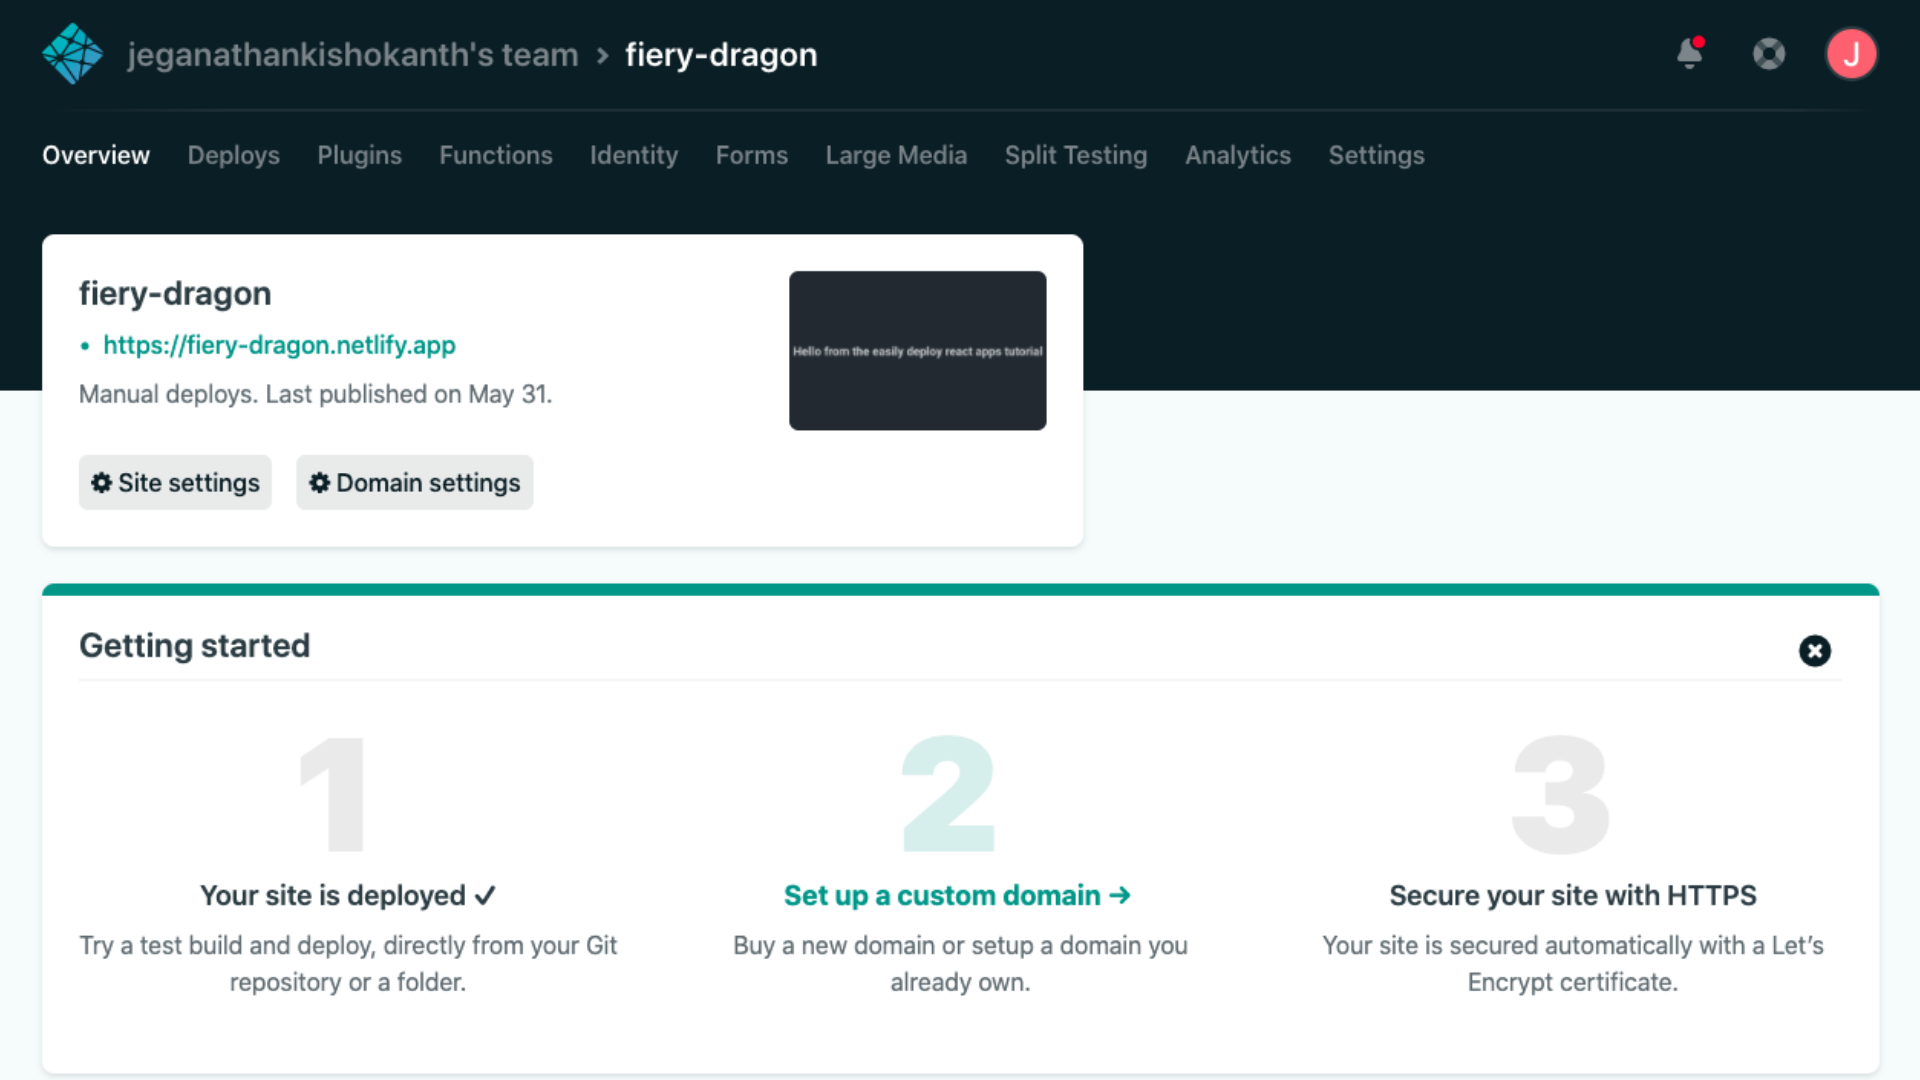
Woohoo! Congratulations! You just deployed a React app in just 2 steps!
Ah, but wait. What if you want to change the funny name of the deploy link in which your React project is hosted? Easy! All you have to do is look for Site Settings and then choose Change Site Name. Just remember that you will not be able to change the .netlify.app of your link as it is hosted on a Netlify doman. But hey, if you have a domain that you own, you can easily connect it here. I will cover how to do that in a a future blog post.
If you found what you read informative and helpful, please let me know and follow me on my social media channels for more! If not you can just sign up to my email newsletter below to be notified of any blog post I publish.